Are you starting a blog with minimal investment? Amazon Lightsail is an excellent server option, particularly for beginners. It offers a free one-month trial, allowing you to explore its features without any upfront costs. Once the trial period ends, you can choose a pricing plan that fits your needs.
If you aim to host a single blog, the WordPress instance can be installed with just one click, making it perfect for new bloggers. However, for users who want to host multiple domains or require root access, configuring Amazon Lightsail with ServerPilot offers a flexible and free solution.
Why Choose ServerPilot Over cPanel?
Unlike cPanel, which can overwhelm users with numerous features, ServerPilot offers a more straightforward and user-friendly interface. It grants access to critical options like database creation, domain management, and file uploads. You can use any FTP client to manage files, though FileZilla is highly recommended due to its free availability and ease of use. While the setup process for integrating Amazon Lightsail with ServerPilot may take some time, it’s not overly complex. Even if you’re new to servers, a video tutorial at the end of this article can guide you step by step.
How to Configure Amazon Lightsail With Serverpilot
Setting Up Amazon Lightsail for Serverpilot
To start, you need to have an active Amazon Lightsail account. If you’re new, sign up for the one-month free trial. If you already have an account, head over to your dashboard.
Creating a New Instance
- Click on “Create Instance.” On your dashboard, look for the “Create Instance” button and click on it.
- Select Base OS: On the next screen, you’ll be given two options: “App+OS” and “Base OS.” Choose “Base OS” since you’ll use an independent server with Serverpilot.
- Pick Ubuntu 16.04 LTS: You will now see two options: Amazon Linux and Ubuntu 16.04 LTS. Choose Ubuntu 16.04 LTS for compatibility with Serverpilot.
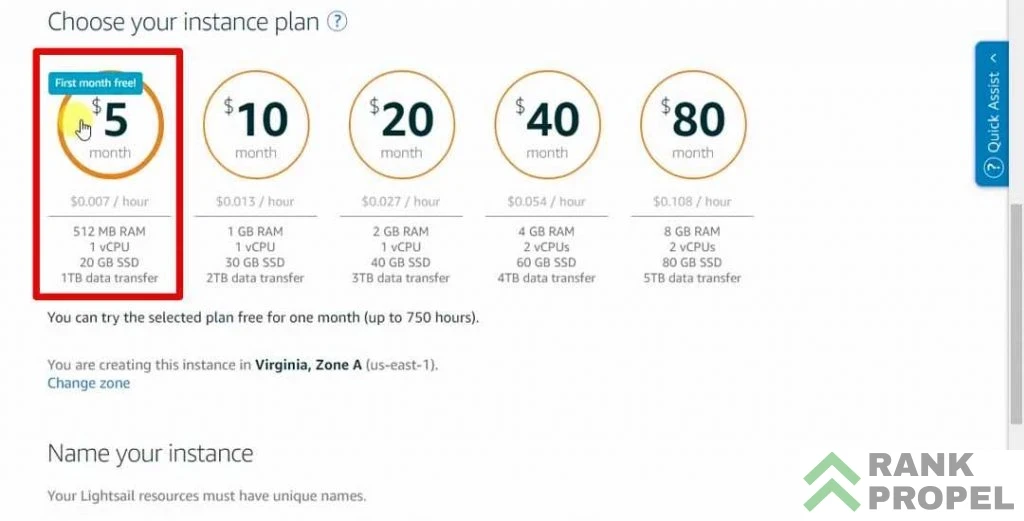
- Choose Your Plan: Scroll down to select the free plan for your first month. Alternatively, you can choose a higher plan if you require more resources.
- Name Your Instance: Choose a name for your instance. This could be your domain name or leave the auto-generated name. Once you’re ready, click on “Create.”

Note: It may take a few minutes for the instance to be created. Please be patient until you receive a confirmation.
Configuring the Instance
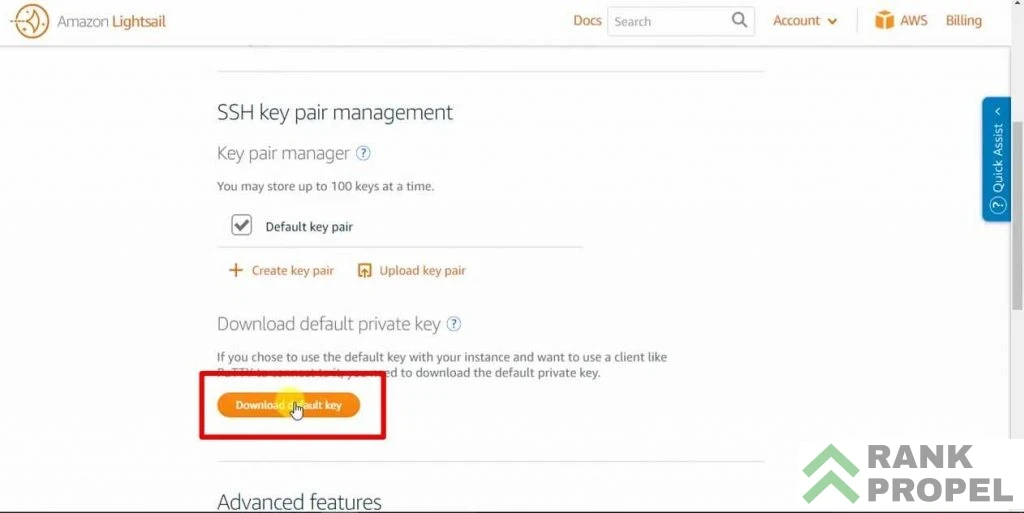
- Download the Default Key: Click “Account” in the top corner once your instance is created. Download the default key and save it to your desktop for easy access. This will be a
.pemfile, which you’ll need to convert to.ppk. - Convert the Key: Use Puttygen to convert the
.pemfile to a.ppkfile. Open Puttygen, load the.pemfile, and click “Save private key.” - Manage Networking: Return to the Amazon Lightsail dashboard, find your newly created instance, and click on the three dots. Select “Manage” and then “Networking.” Scroll down to the firewall settings and add a new rule for HTTPS. Click “Save” when you’re done.
Connecting Serverpilot to Amazon Lightsail
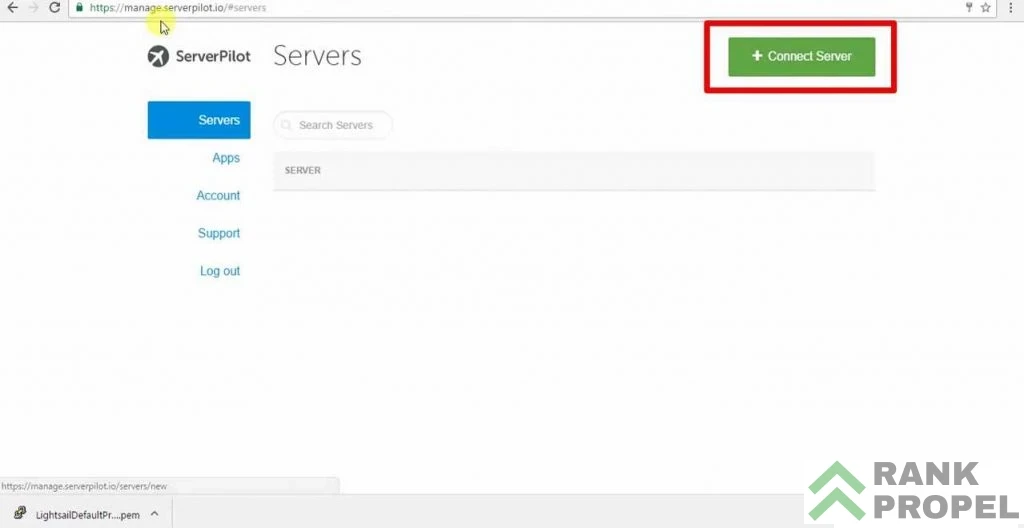
- Sign Up or Log In to Serverpilot: Go to Serverpilot’s website and either sign up for a new account or log in if you already have one. Once you’re in, click on “Connect Server.”
- Enter Server Details: Select the option that says, “I don’t have a root password or public IP address.” You’ll need to enter the IP address of the instance you created in Amazon Lightsail and the password that Amazon sent to your email.
- Open Putty for SSH Connection: Open Putty and enter the IP address of your instance in the “Host Name” field. On the left side, navigate to “SSH” > “Auth” and add the
.ppkprivate key file that you converted earlier.
Finalizing the Serverpilot Installation
- Enter Username and Password: Once Putty opens the connection, you will be prompted for a username and password. The default username is “Ubuntu,” and the password you received from Amazon Lightsail.
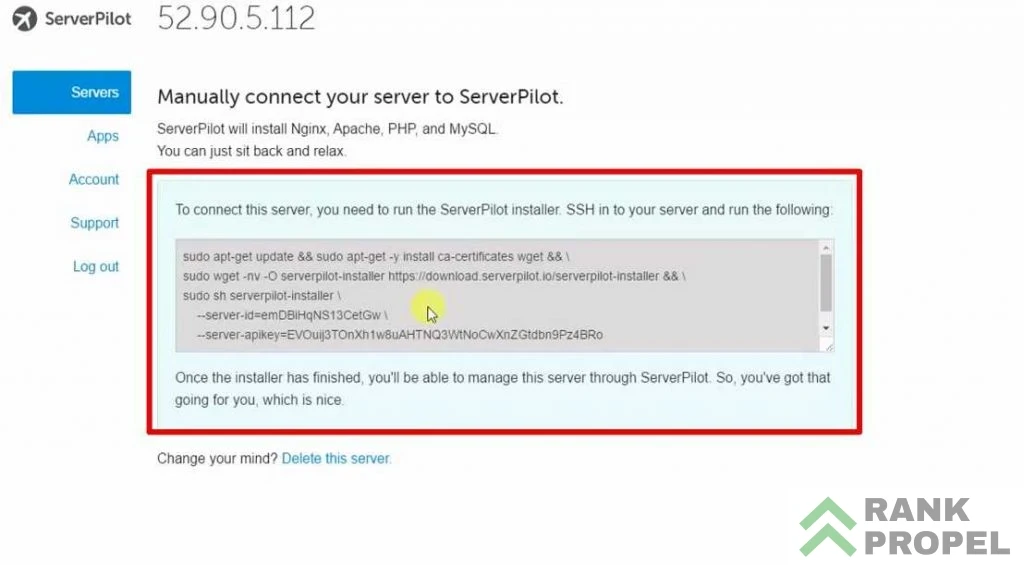
- Run the Installation Commands: Copy and paste the following commands into Putty one by one: bash Copy code
sudo apt-get update && sudo apt-get -y install wget ca-certificates && \ sudo wget -nv -O serverpilot-installer \ https://download.serverpilot.io/serverpilot-installer && \ sudo sh serverpilot-installer - Complete Serverpilot Setup: After running the above commands, Serverpilot will automatically provide you with additional command lines, including
server-idandserver-apikey. Copy and paste these into Putty when prompted. Serverpilot will then begin the installation process.
Completion
Once everything is set up, your Serverpilot page will open automatically in your browser, confirming the installation is complete.
If you followed each step closely, your Amazon Lightsail instance should now be successfully configured with Serverpilot. If you encounter any issues, please ask questions in the comment section or watch the video tutorial.
FAQs
Q1: What is Amazon Lightsail?
Q2: What is Serverpilot?
Q3: Why do I need to convert the .pem file to .ppk?
.pem file is the default key format provided by Amazon Lightsail for SSH access. Putty, a popular SSH client, does not support .pem files. Therefore, you need to convert it to .ppk using Puttygen for compatibility with Putty.Q4: Can I use a different version of Ubuntu?
Q5: How long does it take to set up Amazon Lightsail with Serverpilot?
Q6: What should I do if I encounter issues during installation?
Q7: Is sharing my .ppk file or server details with others safe?
.ppk file, IP address, or server credentials with anyone. This information is sensitive and could lead to security breaches if shared.